Integrating OpenShift Pipelines with Gogs
It's time to add the C (continuous) to your CI/CD pipeline.
Add a Gogs Trigger
-
Choose
Add Triggerfrom the pipeline menu
-
Configure the trigger as follows (copy and paste boxes below image) and click
Addto add the trigger to your pipeline: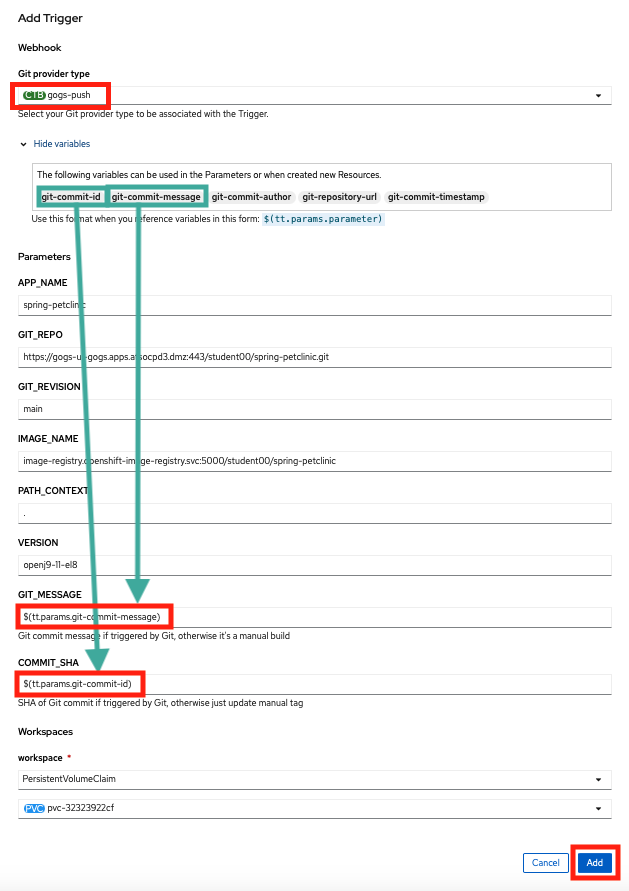
Note
The
Git_Repoparameter should have your student instead ofstudent00. This should already be correctly filled out for you, so please don't change that tostudent00.Git Provider Typegogs-pushNote
gogs-pushis in a menu you need to select fromGIT_MESSAGE$(tt.params.git-commit-message)COMMIT_SHA$(tt.params.git-commit-id)
You are choosing the gogs-push cluster trigger binding, which we defined for our cluster using the webhook parameters from Gogs. This passes information into a number of different variables which you can list by clicking the expand arrow seen in the picture (It will initially say Show Variables and then switch to Hide Variables when expanded as shown in the picture). You will be using the variables in green boxes in the picture to pass the git commit message (git-commit-message) as well as the SHA (id) of the git commit (git-commit-id) to the build pipeline from the Gogs webhook that triggers the build.
Setting up Git Webhook
Now, you need to set up a webhook from Gogs. You want this to hit your event listener, the pipelines resource which listens for events from outside sources in order to trigger a build. The listener you set up is using the gogs-push trigger binding to trigger a new pipeline run for your spring-petclinic pipeline passing the gogs-push parameters mentioned before. You created this event-listener via the OpenShift Pipelines UI when you added a trigger and will see it in the Topology section of the OpenShift UI as another application when you travel back there later. In order to setup your webhook to send a message to the event listener after a git push, do the following:
-
Find the event listener url from the
Detailsview of your pipeline and copy it using the copy button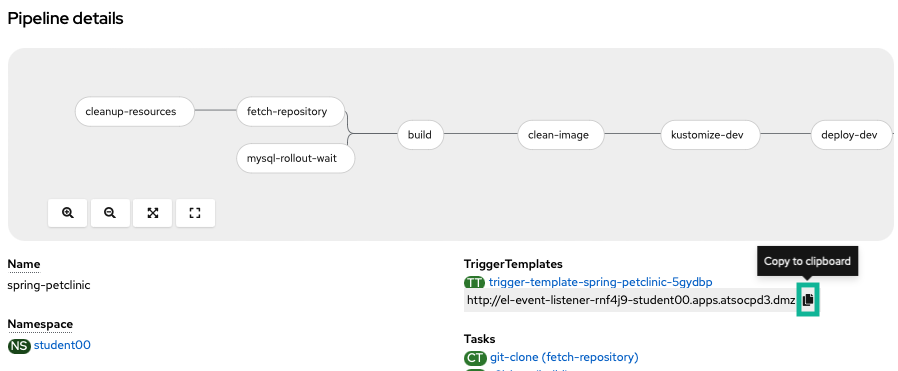
Find the value listed for your pipeline and copy that value.
-
Navigate to your git repository of the
spring-petclinicapplication.Tip
Your git repository should be in the form
https://gogs-ui-gogs.apps.atsocpd3.dmz/yourstudent/spring-petclinicwhere yourstudent is your lab student such ashttps://gogs-ui-gogs.apps.atsocpd3.dmz/student00/spring-petclinicfor student00. You can also navigate to your repository in gogs here by logging in (if not logged in already) and then clicking on thespring-petclinicrepository from your repositories like you did in the first section of the lab. -
Go to the
settingspage of the repository and add aGogswebhook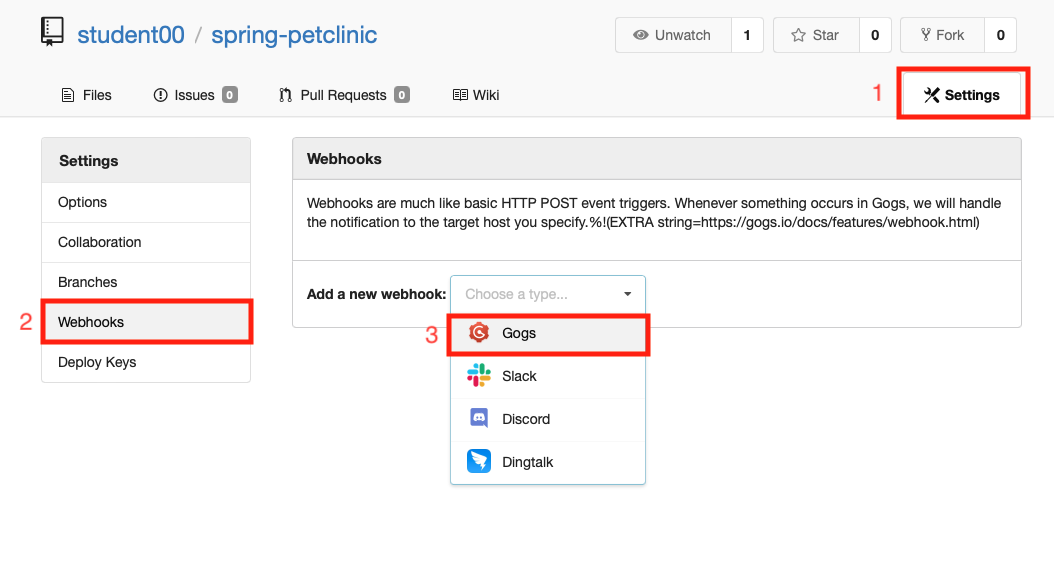
-
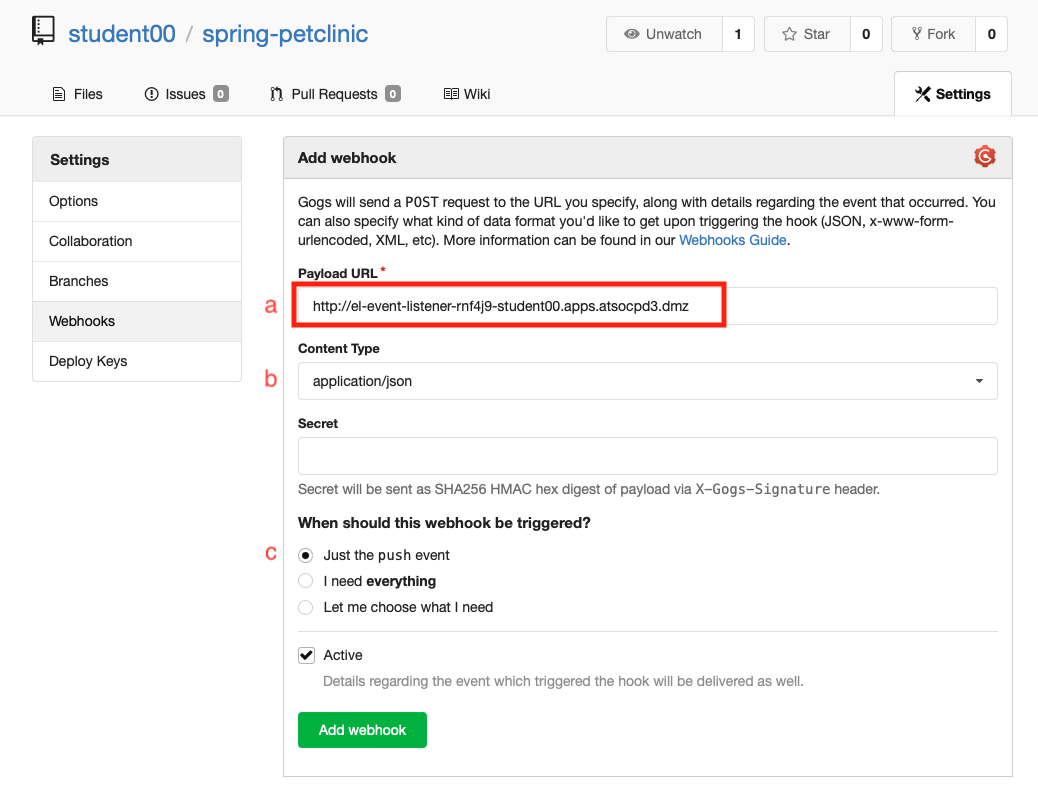
Go to the Webhooks section and add a webhook with:
-
event listener URLas thePAYLOAD_URL -
application/jsonselected as theContent type -
Just the push eventselected forWhich events would you like to trigger this webhook?.
-
-
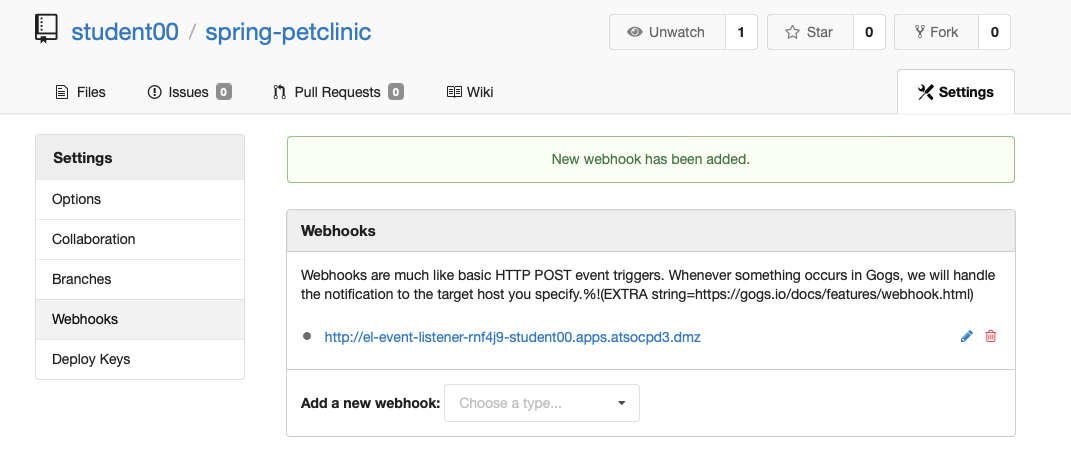
See the successfully created webhook now listed
Summary  
You created a Gogs webhook for your spring-petclinic repository that will trigger a new run of your spring-petclinic pipeline when new code is pushed to your Gogs repo1. You will trigger your pipeline via Gogs in the next section.
-
A more detailed explanation is that when new code is pushed to your Gogs repo, the Gogs webhook will send a payload to the event listener which then interacts with a number of OpenShift Pipelines-associated Kubernetes custom resources that you created when you used the
Add Triggerbutton in the UI. Namely, the event listener will trigger a newPipelineRunof yourspring-petclinicpipeline based on thespring-petclinicTriggerTemplatepassing it the values for the git commit SHA hash and the commit message using the variables populated via thegogs-pushClusterTriggerBinding. ↩
Created: April 29, 2021